How to Use DTF Powder
DTF Powder
DTF (Direct-to-Film) printing has made custom fabric designs more accessible than ever. One of the key elements of this process is DTF powder, also called adhesive powder, which allows the printed design to stick to the fabric during heat transfer. Understanding how to use correctly is essential for achieving vibrant, long-lasting prints.
What is DTF Powder?
DTF powder is a specially formulated adhesive that bonds the printed ink to the fabric. After printing your design onto a PET transfer film, the powder is applied to the wet ink. During the heat press stage, the powder melts and firmly attaches the design to the fabric.
Unlike regular glues or sprays, designed to maintain flexibility and softness, ensuring the final print does not feel stiff or heavy. It works on various fabrics, including cotton, polyester, and blends, making it ideal for t-shirts, hoodies, tote bags, and more.
Materials Needed
Before using , make sure you have the following items:
-
Printed DTF transfer film – Freshly printed design
-
DTF adhesive powder – Fine, specially formulated powder
-
Sifter or shaker – For even application
-
Heat press or oven – For curing the powder
-
Lint roller & scissors – For preparation and cleanup
Step-by-Step Guide to Using DTF Powder
Step 1: Print Your Design
Start by printing your design on a PET transfer film using DTF inks. Ensure the image is clear and vibrant.
Step 2: Apply the Powder
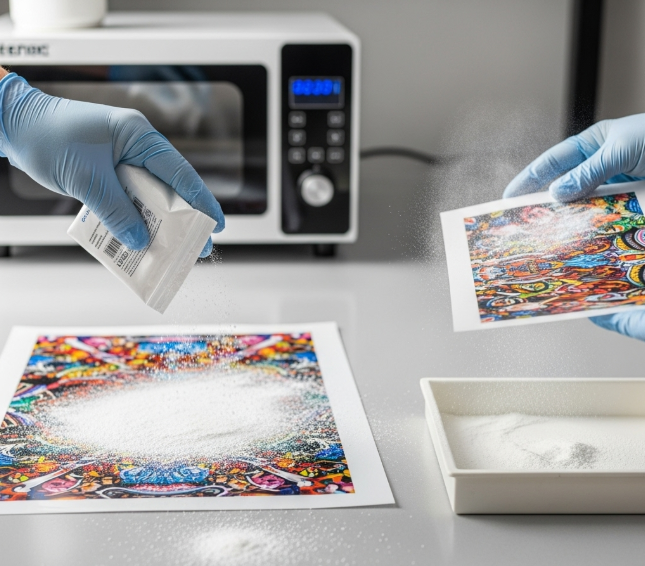
While the ink is still wet, sprinkle the DTF powder evenly over the design. Use a sifter or shaker for better control. Make sure the entire printed area is covered.
Step 3: Shake Off Excess Powder
Gently tap or shake the film to remove any extra powder. Too much powder can create uneven transfers or affect the final adhesion.
Step 4: Cure the Powder
Place the film in a heat press or oven at a low temperature (around 100–120°C) for a few seconds. This melts the powder slightly so it adheres to the ink but doesn’t transfer yet.
Step 5: Transfer to Fabric
Position the film design-side down on the fabric. Apply heat with a press at 160–170°C for 15–20 seconds. Peel the film carefully, either hot or cold depending on the powder type.
Tips for Best Results
-
Always apply powder while ink is wet for proper adhesion.
-
Use a fine powder to prevent clumping.
-
Test small designs first to perfect temperature, time, and pressure.
-
Keep the workspace clean to avoid powder contamination.
Final Thoughts
Applying properly is a key factor in achieving professional-quality transfers. When each step—from sprinkling the powder to curing and heat pressing—is done with attention, the results are consistently vibrant and durable. The design adheres smoothly to the fabric while maintaining a soft, natural feel, avoiding the stiffness sometimes associated with older transfer methods.
Taking the time to practice and experiment with different powders, temperatures, and fabric types can significantly improve the final outcome. This approach allows you to understand how materials interact and fine-tune your technique for the best results.
Mastering this process opens the door to a variety of creative applications. From customizing garments for personal use to producing small batches for a boutique or online store, the ability to handle this critical step reliably ensures every project meets a high standard. The satisfaction comes not only from the finished product but also from the hands-on experience of perfecting each design, giving you the freedom to explore new styles and techniques.
Ultimately, careful use of empowers creators to produce durable, visually striking transfers that feel professional and stand out on any fabric, making it an essential skill for anyone invested in fabric customization.

