How to Create DTF Transfers
A Comprehensive Step-by-Step Guide Create DTF Transfers
The apparel decoration industry has seen a massive shift toward digital solutions. Learning How to Create DTF Transfers is now a top priority for many print shops. This method combines the quality of screen printing with the ease of digital inkjet. It allows you to print vibrant designs on almost any type of fabric. Whether you are a small hobbyist or a business owner, the process is accessible. This guide will walk you through the entire workflow from start to finish. We will cover equipment, software, and the physical steps of production.
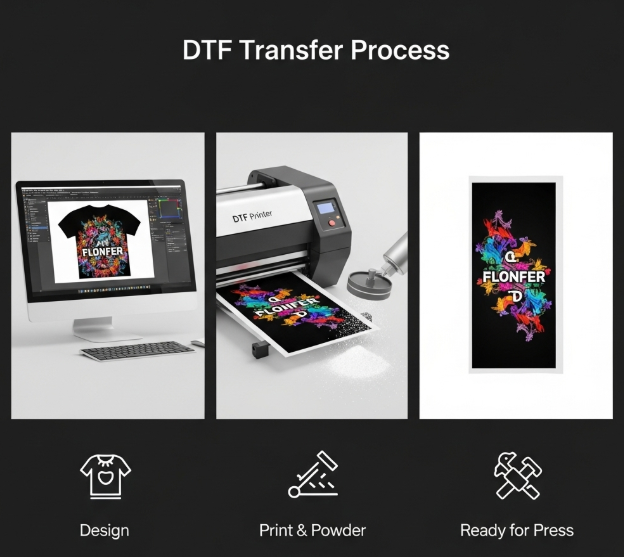
Understanding the DTF Printing Process
Direct-to-Film (DTF) involves printing a design onto a special PET film. This film then acts as a carrier for the image.
The Role of the Ink DTF uses specialized water-based textile inks. These inks include Cyan, Magenta, Yellow, Black, and a very opaque White. The white ink is the most important part. It creates a solid base for the colors to sit on. This allows the design to show up clearly on dark fabrics. When you learn How to Create DTF Transfers, you see that ink management is vital.
The Adhesive Layer Unlike other methods, DTF requires a hot-melt adhesive powder. This powder is applied to the wet ink on the film. When heated, it turns into a strong glue. This glue bonds the ink directly to the fibers of your garment. This creates a durable and flexible finish that lasts for many washes.
Required Equipment and Materials
To start, you need a specific set of tools. You cannot use a regular office printer for this process.
-
DTF Printer: You need a printer modified with a white ink circulation system.
-
DTF Inks: Specialized textile inks designed for PET film.
-
PET Film: A transparent or semi-transparent film with a special coating.
-
Adhesive Powder: TPU (Thermoplastic Polyurethane) hot-melt powder.
-
Curing Oven: A dedicated oven or a heat press with a hovering function.
-
RIP Software: Professional software to manage white ink layers.
Step 1: Preparing Your Digital Artwork
Every great print starts with a high-quality digital file. This is the first step in How to Create DTF Transfers.
File Format and Resolution Use high-resolution files, ideally 300 DPI or higher. Vector files (AI, EPS, PDF) or transparent PNGs work best. If the background is not transparent, the printer will print a white box around your design. This is a common mistake for beginners.
Using RIP Software A standard printer driver cannot tell the printer when to use white ink. You must use a Raster Image Processor (RIP) software. This software allows you to "mirror" your image. It also tells the printer to print the color layer first and the white layer second. This is the foundation of How to Create DTF Transfers successfully.
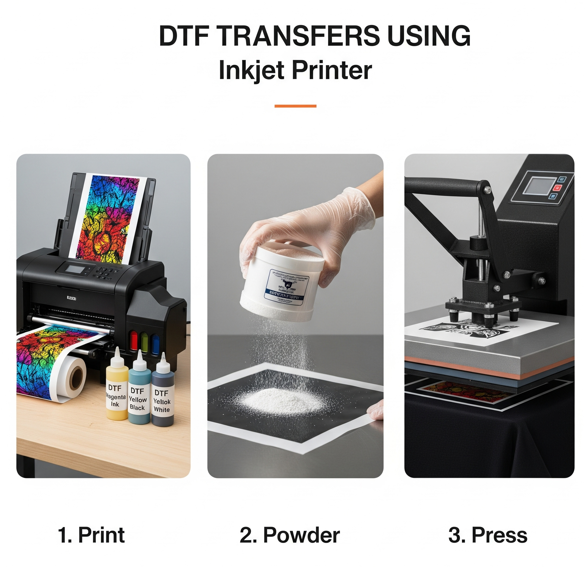
Step 2: The Printing Phase
Once your file is ready, you can start the printing process on your PET film.
Setting Up the Film Load the film into the printer correctly. One side has a special coating that holds the ink. Make sure you are printing on the matte side, not the glossy side.
The Layering Technique The printer will first lay down the CMYK colors. Immediately after, it covers the colors with a thick layer of white ink. This white layer must stay wet for the next step. If your printer is too slow and the ink dries, the powder will not stick. Mastering the speed of your machine is part of learning How to Create DTF Transfers.
Step 3: Applying the Adhesive Powder
This step must happen while the white ink is still wet and "tacky."
Uniform Coating Spread the DTF Printing Powder over the wet ink. You can do this manually in a tray or use an automatic shaker machine. Ensure that every part of the printed area is covered. The powder only sticks to the wet ink, not the clear parts of the film.
Removing the Excess Gently flick or shake the film to remove any extra powder. If you leave excess powder on the film, it will create small spots on the shirt. This is called "speckling." A clean film leads to a professional result. Many pros use a "shaker-dryer" to automate this entire step.
Step 4: Curing the Powder
The powder must be melted before it can be used as a transfer. This is a critical stage in How to Create DTF Transfers.
Using a Curing Oven Place the film inside a DTF curing oven. Set the temperature to approximately 150°C (302°F). Bake the film for 2 to 3 minutes. You will see the powder change from a white dust to a clear, orange-peel texture. This means the adhesive is fully activated.
Using a Heat Press to Cure If you do not have an oven, you can use your heat press. Hover the heat platen about 1 to 2 centimeters above the film. Do not let the metal touch the wet ink. The heat radiating from the press will melt the powder. This method works well for small batches or hobbyists.
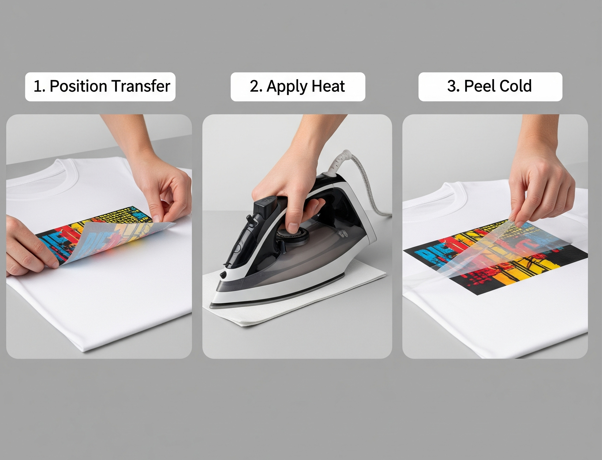
Step 5: Transferring to the Garment
Now that your transfer is ready, it is time to apply it to a shirt or hoodie.
Pre-Pressing the Fabric Press your garment for 5 seconds before adding the transfer. This removes moisture and flattens the surface. Moisture is the biggest enemy of a long-lasting bond.
The Final Press Place the cured film on the garment. Press at 160°C (320°F) for 15 seconds with medium pressure. Wait for the film to cool completely (Cold Peel) before removing the plastic. This ensures the ink stays on the fabric and not the film. Finish with a 5-second "seal press" to improve the texture.
Troubleshooting Common DTF Issues
Even if you know How to Create DTF Transfers, things can go wrong.
-
White Ink Clogging: White ink settles quickly. You must shake your ink tanks every day to prevent clogs.
-
Oily Residue on Film: This happens if the curing temperature is too low. Ensure your oven is reaching the correct heat.
-
Cracking Prints: This is often caused by low-quality adhesive powder. Always use high-grade TPU powder for better elasticity.
Maintenance for Consistent Results
A DTF printer requires more care than a standard printer. Daily maintenance is the only way to avoid expensive repairs.
Daily Nozzle Checks Always run a nozzle check before you start printing. This ensures all colors are flowing correctly. If you see gaps in the lines, run a cleaning cycle.
Humidity Control DTF inks work best in a controlled environment. Aim for a humidity level between 40% and 60%. If the air is too dry, the ink will dry inside the printhead. If it is too humid, the ink might not dry correctly on the film.
Conclusion
Learning How to Create DTF Transfers opens a world of creative potential. It allows you to produce high-quality, durable designs on demand. By following these steps—design, print, powder, cure, and press—you can achieve professional results. Remember that quality materials and regular maintenance are the keys to success. Whether you are making one shirt or one thousand, the DTF process is a reliable choice for the modern decorator.
Join our growing community online to stay updated with the latest trends and innovations in the printing world. Follow us on
Bringing your custom designs to life with professional quality has never been easier. For high-resolution and durable prints, visit our