Everything You Need to Know About Cutting DTF Gang Sheets
Everything You Need to Know About Cutting DTF Gang Sheets
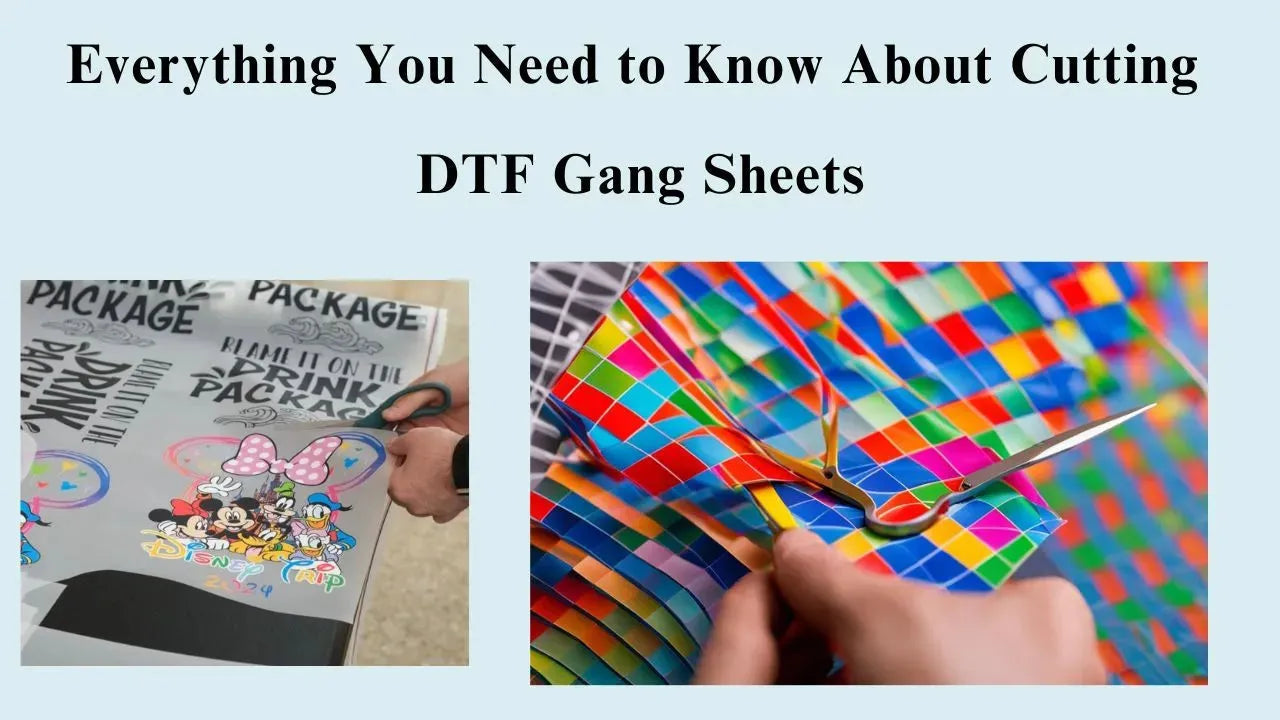
DTF (Direct-to-Film) printing is a versatile and efficient method for producing custom transfers on apparel and accessories. A gang sheet is a layout where multiple designs are printed on a single sheet, saving time, materials, and costs. Properly cutting these gang sheets is critical to achieving professional results, ensuring each transfer adheres correctly and maintains its quality.
Whether you are a small business owner, hobbyist, or professional printer, mastering the cutting process can significantly improve workflow and reduce wasted materials.
Why Cutting DTF Gang Sheets Properly Matters
The quality of your final prints depends not only on the printing process but also on the cutting process. Incorrect cutting can result in damaged designs, uneven edges, or difficulty applying transfers to fabric. By carefully planning and executing the cut, you can achieve clean, precise transfers that adhere perfectly to garments.
Proper cutting also maximizes the use of film, minimizing waste and reducing overall production costs. This efficiency is especially valuable for small businesses or large-scale printing operations.
Tools and Equipment for Cutting
To achieve clean cuts on DTF gang sheets, it is essential to use the right tools. Popular options include:
-
Scissors or Craft Knives: Suitable for small batches or individual sheets, allowing precise trimming of detailed designs.
-
Rotary Cutters: Provide straight, consistent cuts for larger sheets and repetitive patterns.
-
Cutting Machines: Devices like Cricut or Silhouette can automate cutting for complex shapes, saving time and improving accuracy.
-
Rulers and Cutting Mats: Ensure straight lines and protect surfaces during manual cutting.
Choosing the right tool depends on the size of your batch, the complexity of your designs, and the precision required.
Preparation Before Cutting
Before cutting, several preparatory steps help ensure success:
-
Inspect the Printed Sheet: Check for smudges, misaligned prints, or any imperfections that could affect the cut.
-
Plan the Layout: Determine where each design should be cut. Marking guidelines with a light pencil or non-permanent marker can help maintain accuracy.
-
Clean Work Area: Ensure your workspace is free of debris to prevent scratches or damage to the film.
-
Pre-Cut Test: Consider cutting a single design first to verify settings, tools, and alignment before proceeding with the entire sheet.
Proper preparation reduces errors and ensures the gang sheet is handled carefully throughout the process.
Step-by-Step Cutting Process
-
Separate Individual Designs: Using scissors or a cutting machine, carefully cut around each design, leaving a small margin to prevent damage.
-
Maintain Consistent Margins: Keeping uniform spacing around each transfer ensures easier application to garments and prevents adhesive loss.
-
Follow Guidelines for Complex Shapes: For intricate designs, cut slowly and steadily to preserve fine details like text, small icons, or delicate edges.
-
Check Each Transfer: After cutting, inspect each piece for clean edges and intact adhesive. Any imperfections can affect final application quality.
Consistent and careful cutting ensures professional results for every transfer.
Tips for Efficiency and Accuracy
-
Batch Cutting: When possible, cut multiple sheets together using a ruler or cutting machine to save time.
-
Use Sharp Tools: Dull blades can cause tearing, uneven edges, or jagged lines. Replace or sharpen blades regularly.
-
Organize by Size or Design: Group similar designs together to streamline the cutting process and reduce errors.
-
Label Each Piece: Especially for large batches, labeling can help track designs and avoid confusion during application.
Efficient cutting practices improve workflow, reduce waste, and maintain high-quality results.
Common Challenges and How to Overcome Them
-
Curved or Intricate Edges: Use precision scissors or a craft knife, and take your time to follow the design accurately.
-
Sticky or Slippery Film: Handle sheets carefully, and consider placing a non-stick surface under the film to prevent sticking.
-
Misaligned Cuts: Pre-marking guidelines and using cutting mats can help maintain alignment.
-
Damaged Adhesive: Avoid touching the adhesive side with fingers; clean hands or gloves prevent contamination.
Being aware of these challenges and addressing them proactively ensures smooth cutting and reliable results.
Safety Considerations
When cutting DTF gang sheets, safety should always be a priority:
-
Always cut away from your body to prevent accidents.
-
Keep sharp tools out of reach of children.
-
Use a cutting mat to protect your work surface and prevent blade slippage.
Following proper safety precautions ensures a secure and accident-free workspace.
Conclusion
Cutting DTF gang sheets is a crucial step in the custom printing process. Proper preparation, the right tools, and careful attention to detail ensure that each transfer is clean, precise, and ready for application. By mastering cutting techniques, creators and businesses can improve workflow, reduce waste, and achieve professional results every time.
From small-scale DIY projects to large production runs, understanding the principles of cutting DTF gang sheets enhances both efficiency and quality. Following these tips guarantees that your vibrant, detailed transfers maintain their integrity and deliver a polished finish on any fabric.

%20printing%20is%20a%20versatile%20and%20efficient%20method%20for%20producing%20custom%20transfers%20on%20apparel%20and%20accessories.%20A%20gang%20sheet%20i...)
Leave a comment
This site is protected by hCaptcha and the hCaptcha Privacy Policy and Terms of Service apply.