How to Make UV DTF Cup Wraps
How to Make UV DTF Cup Wraps: A Step-by-Step Guide
If you’re looking to create custom, vibrant cup wraps that will catch everyone’s eye, UV DTF (Direct-to-Film) printing is an excellent option. This method combines the precision of UV printing with the flexibility of DTF technology, enabling you to print high-quality designs on various surfaces, including cups, mugs, and other drinkware. In this step-by-step guide, we’ll walk you through how to make UV DTF cup wraps, from design to application.
What is UV DTF Printing?
Before diving into the process, it’s important to understand what UV DTF printing is. UV DTF printing uses a unique printing process where designs are printed onto a special film using UV ink, which is cured by UV light. The film is then transferred to a substrate (in this case, a cup) using heat and pressure. This method provides vibrant, durable prints that are resistant to fading, cracking, or peeling, making it perfect for creating custom drinkware that will last.
Materials You'll Need
-
UV DTF Printer: A printer capable of printing with UV inks on special transfer films.
-
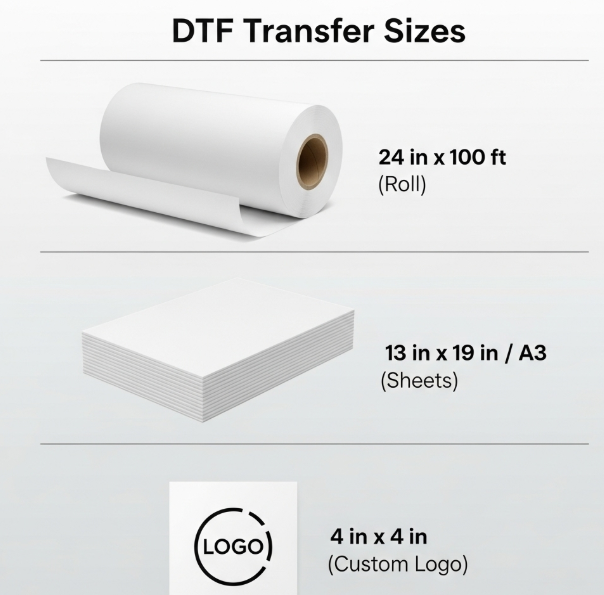
Transfer Film: Special film used to print your designs before transferring them onto the cup.
-
UV Ink: High-quality UV inks that ensure vibrant colors and durability.
-
Cup or Mug: Any type of drinkware, such as ceramic mugs, glass cups, or stainless steel tumblers.
-
Adhesive Powder: To coat the design and ensure it sticks to the cup.
-
Heat Press Machine or UV Curing Lamp: To transfer the design onto the cup and cure the ink.
-
Scissors or Cutting Tool: To trim the transfer film to the size of the cup.
-
Protective Gloves (optional): To handle the transfer film and cups without damaging the design.
Step 1: Design Your Artwork
The first step in making a UV DTF cup wrap is designing your artwork. Use graphic design software such as Adobe Illustrator, CorelDRAW, or Canva to create your custom design. Keep in mind the size and shape of the cup you’ll be using. For most cups, you'll want a design that wraps around the entire circumference of the cup without distorting too much.
When designing, make sure to leave some margin around the edges of your design to ensure that it doesn’t get cut off during the transfer process. It's also helpful to design with the idea of aligning key elements (like logos or text) in the right position once applied.
UV DTF Cup Wraps
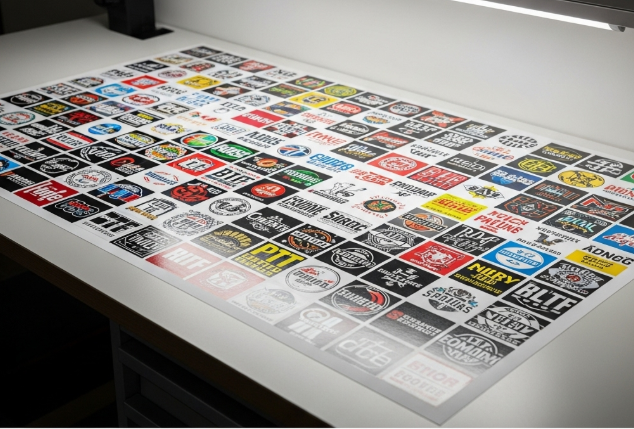
Step 2: Print the Design
Once your design is ready, it's time to print it onto the transfer film. Here’s how to do it:
-
Load the Transfer Film: Place the transfer film into your UV DTF printer.
-
Select the Correct Settings: Adjust the printer settings according to the film and UV ink you’re using. Ensure you're printing in high resolution to get vibrant, sharp details.
-
Print the Design: Print your artwork onto the transfer film. The print should be mirrored so that the design will appear correctly once transferred to the cup.
Remember that UV DTF printers use UV ink that is cured with UV light, so the print will be dry immediately after it’s done printing.
Step 3: Apply Adhesive Powder
Once the print is complete, you’ll need to apply adhesive powder to the printed film to help the design adhere properly to the cup. Here’s how to do it:
-
Sprinkle the Powder: Sprinkle the adhesive powder evenly over the printed design while the print is still wet. Be careful not to overdo it; just a light, even coat will suffice.
-
Cure the Powder: After applying the powder, cure it by gently heating it, either with a heat press or a curing oven. This step ensures that the adhesive powder bonds to the ink and is ready for transfer.
Step 4: Cut the Transfer Film
Now that the print and adhesive powder are ready, it’s time to cut the transfer film to the size and shape of your cup. Use scissors or a cutting tool to trim the film so that it matches the dimensions of the cup. Make sure to leave a little extra film at the edges to ensure full coverage.
Step 5: Prepare the Cup
While the transfer film is drying and cooling, prepare the cup for the transfer:
-
Clean the Surface: Make sure the cup’s surface is free from dust, oils, or any residue that might interfere with the transfer process. Wipe it down with rubbing alcohol and let it dry completely.
-
Ensure the Cup is Smooth: Ensure that the surface of the cup is even and smooth so that the transfer film will stick properly.
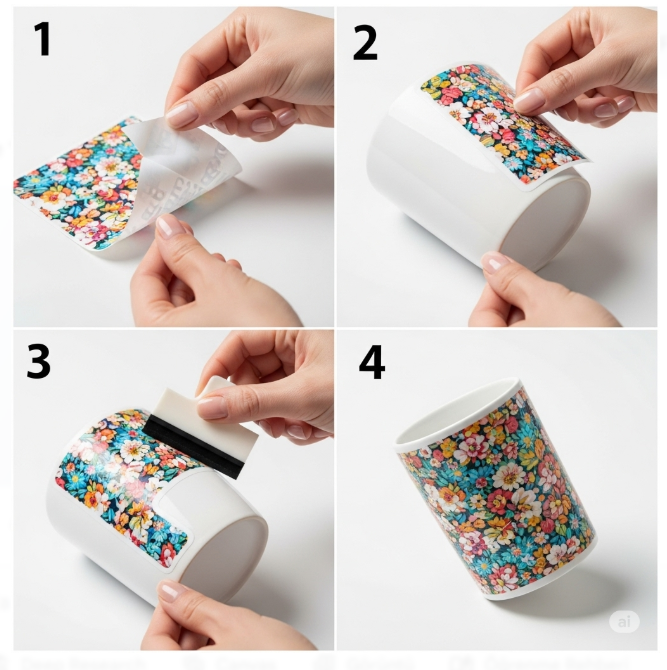
Step 6: Apply the Design
With the transfer film ready and the cup prepped, it’s time to apply the design. Here’s how:
-
Place the Film on the Cup: Carefully position the transfer film around the cup. Make sure it’s aligned properly and covers the area where you want the design to appear.
-
Use Heat and Pressure: Place the cup and transfer film into a heat press machine or use a UV curing lamp. For a heat press, use medium heat and press for about 30-60 seconds, depending on the materials and equipment. This will transfer the design onto the cup.
If using a UV lamp, position the cup under the lamp to cure the ink and transfer the design. Be sure to follow the manufacturer's instructions for curing times and temperatures.
Step 7: Let the Design Cool
Once the transfer process is complete, allow the cup to cool. After it has cooled, carefully peel away the transfer film, revealing the vibrant custom design on your cup. The ink should be fully bonded to the cup, and the design should be crisp, vibrant, and durable.
Step 8: Final Touches
After the design has been transferred, make sure the cup is fully dry and free from any residue. Check for any imperfections and clean the surface if necessary.
Conclusion - UV DTF Cup Wraps
Making UV DTF cup wraps is a straightforward process that allows you to create vibrant, custom drinkware with ease. By following the steps outlined above, you can create high-quality, durable designs that will last for years. Whether you’re personalizing cups for personal use or creating custom items to sell, UV DTF printing offers a fast, effective way to get professional results. Happy printing!
%20printing%20is%20an%20excellent%20option.%20Thi...)